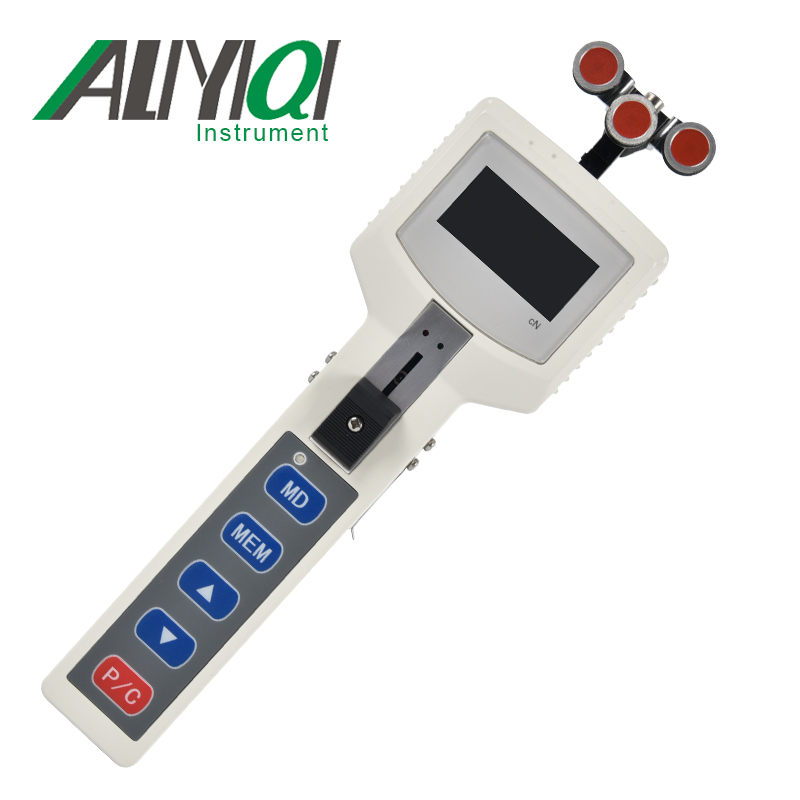
AZSH Handheld Digital Tension Meter Instruction Manual
I. Overview
1.1Main purpose and scope of application
Hand-held digital tension meter is a portable electronic digital measuring instrument that can measure the tension of filamentous and linear materials. It is widely used in wire and cable, textile and chemical fiber, metal wire, carbon fiber and other industries. Can accurately measure tension and process data systematically.
1.2Features
1.2.1Real-time, hold, peak three working modes can be switched arbitrarily.
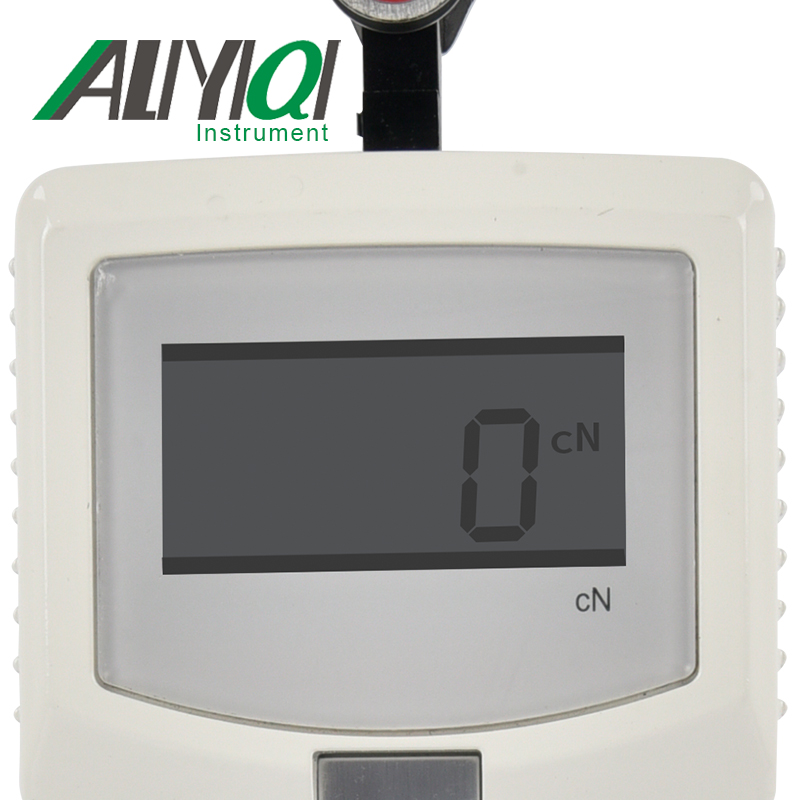
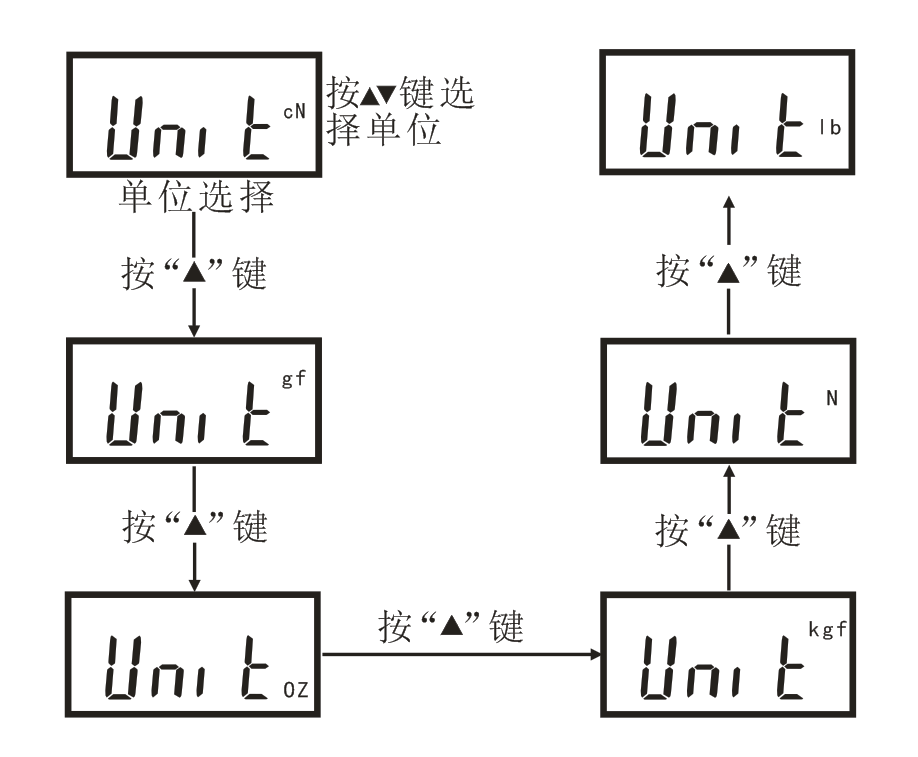
1.2.2cN、gf、OZ、Kgf、N、lbSix units can be set.
1.2.3 Accuracy isFull scale2.5%。
1.2.4Accuratemeasuring10Tension of different materials.
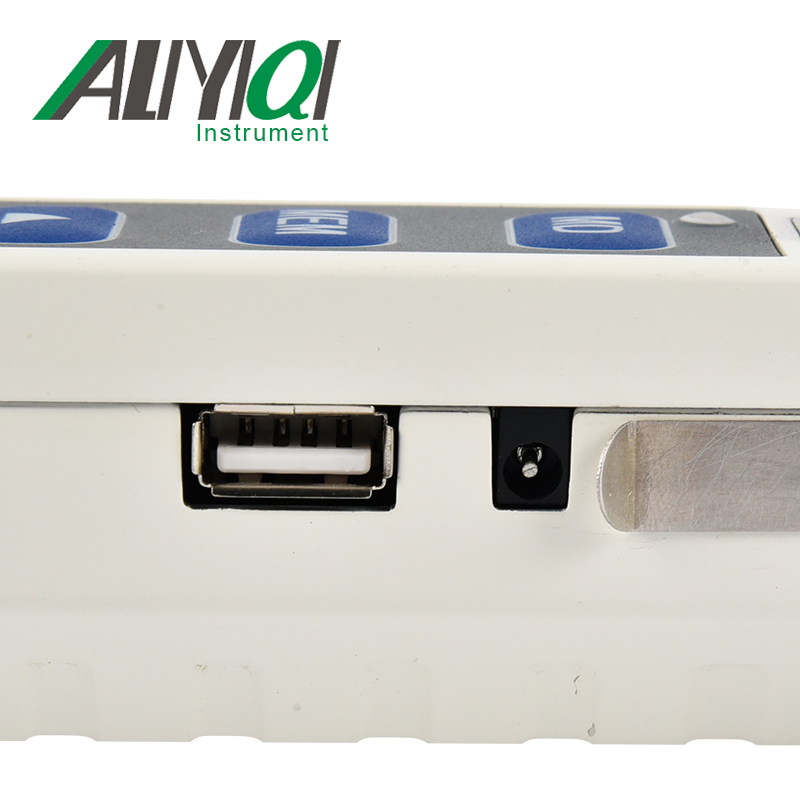
1.2.5 带USBCommunication function。
1.2.6With thickness adjustment function.
1.2.7Easy storage,Storable41Group data.
Second, product model specifications
|
model |
AZSH-200 |
AZSH-500 |
AZSH-1000 |
AZSH-2000 |
AZSH-2500 |
AZSH-5000 |
AZSH-10K |
|
Tension range |
4~ 200.0(CN) |
10~ 500.0(CN) |
20~ 1000(CN) |
40~ 2000(CN) |
50~ 2500(CN) |
100~ 5000(CN) |
2.00 ~ 10.00daN |
|
* Measuring head width (mm) |
65 |
65 |
65 |
65 |
116 |
116 |
116 |
|
** Calibration material Textile PA monofilament |
φ0.12mm |
φ0.12~0.20mm |
φ0.20~0.40mm |
φ0.40~0.70mm |
φ0.40~0.70mm |
φ0.60~1.20mm |
φ0.80~1.40mm |
|
Dimensions (mm) |
270 * 118 * 55 |
||||||
|
net weight(G) |
约640g |
||||||
|
power supply |
3.7Vlithium battery*2 |
||||||
Description:
*: Depending on the model, the width of the lead frame and the distance between the outer sides of the two guide wheels also vary.
**: Our calibration materials are suitable for95%Tension measurement.PA =If the diameter, hardness, shape, etc. of the tested material are significantly different from the company's calibration materials, it is recommended that the customer provide5The measured material of meter length is calibrated.
International Tension Unit:
1CN = 1.02g = 0.01N;
1daN= 1.02kg = 10N。
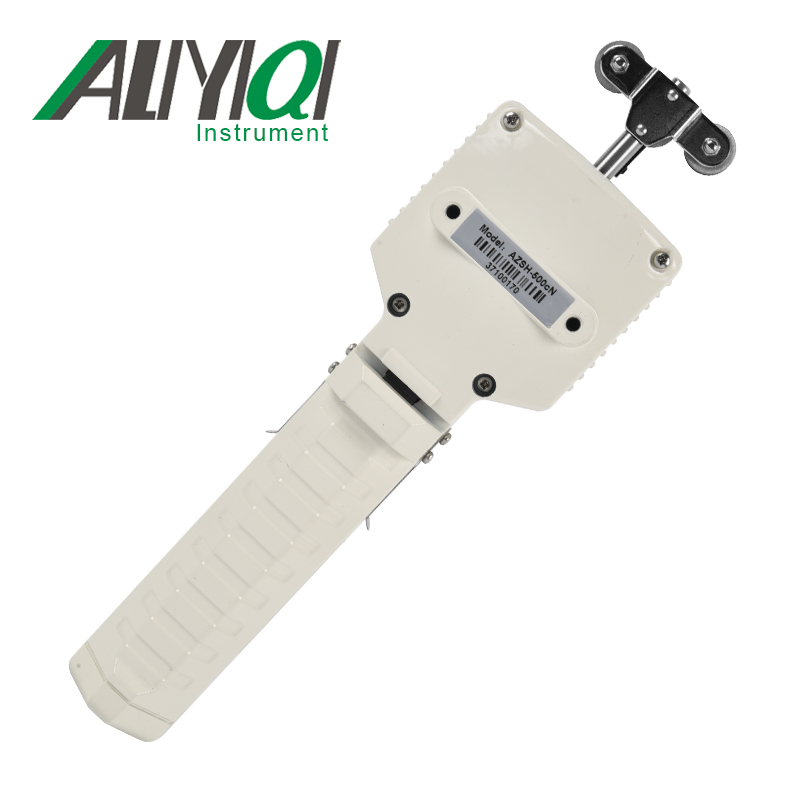
3. Overall product structure
3.1Appearancestructure
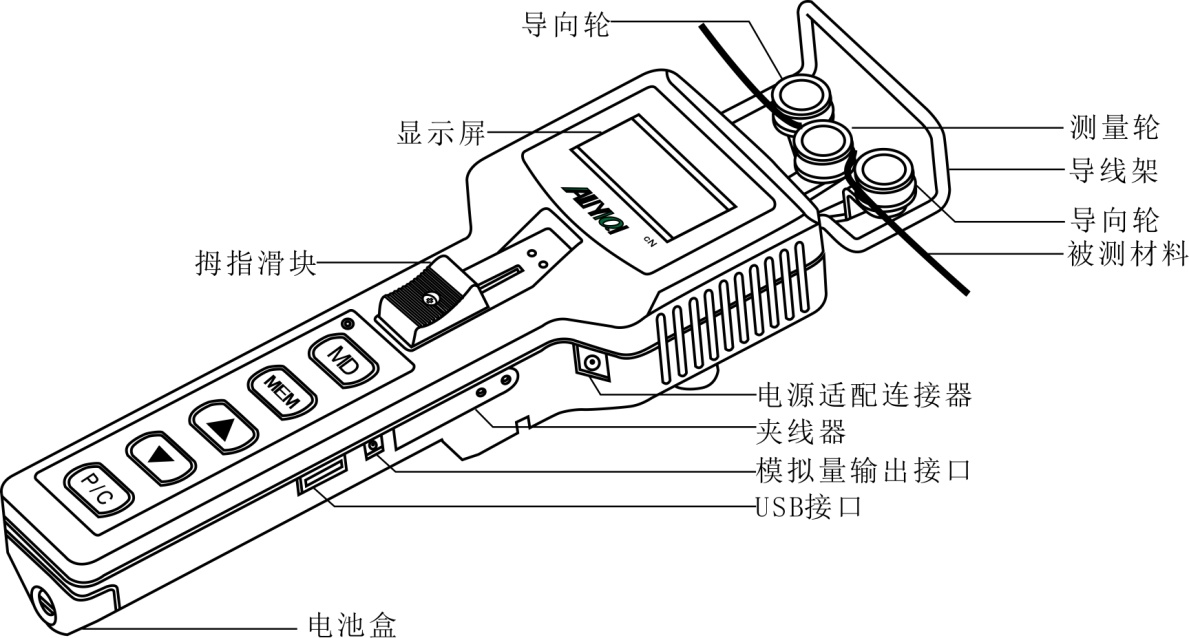
3.2Key Description
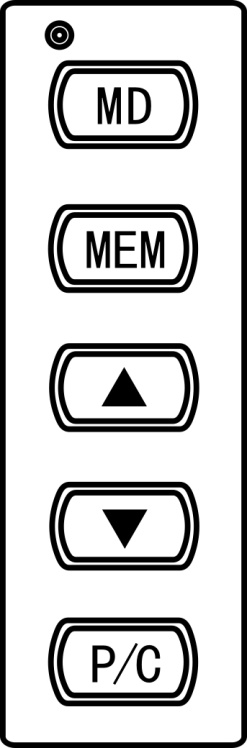
3.2.1\"MD\"key:Operating modeselect/Set interfaceOptions/drop out。In the measurement interface, press this key to switch the real-time mode (no character display on the screen),HOLD(Hold mode)、PEAK(Peak mode);In real-time mode, long press \"MD\"key3Seconds to enter settings项interface;Press \"on any interfaceMD\"Key can exit and return to the measurement interface.
3.2.2\"MEM\"key:save data/View saved data. in\"PEAK\"Mode,短press\"MEM\"Key can save the force value, if continued短press\"MEM\"Key will always save the current force value;In real-time mode,短press\"MEM\"Key to enter the data view interface;in\"HOLD\"In mode, short press for the first time \"MEM\"键Start saving data, short press the second time\"MEM\"键Indicates that the data has been saved as功;In the setting item interface, press \"MEM\"Key to view the next setting item.
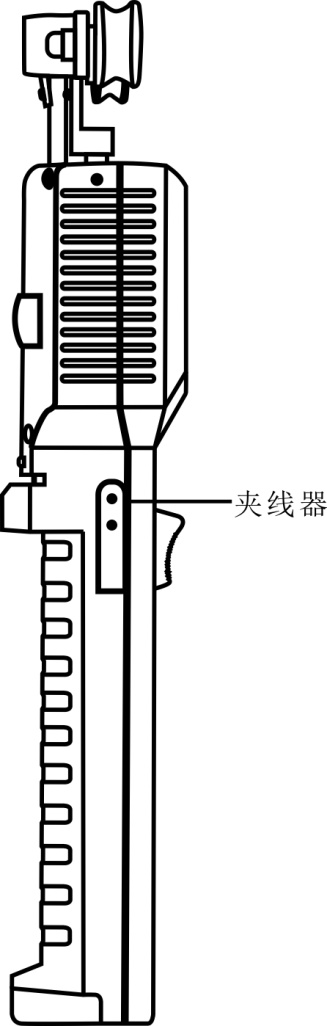
3.2.3 \"P / C\"key:Switch machine/Zero key/Delete key。Press\"P / C\" 键3Open in seconds/Power off; short press in real-time and peak modeP / C\" The key force value is cleared; in the data viewing interface, short pressP / C\"Key to delete the current force value.
4. Menu function introduction
4.1System function settings

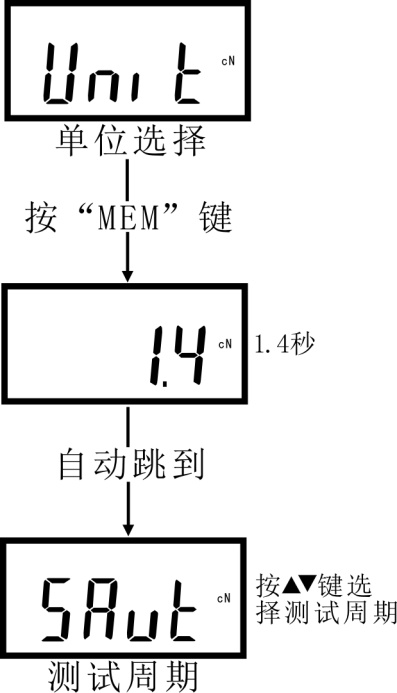
4.2Unit selection
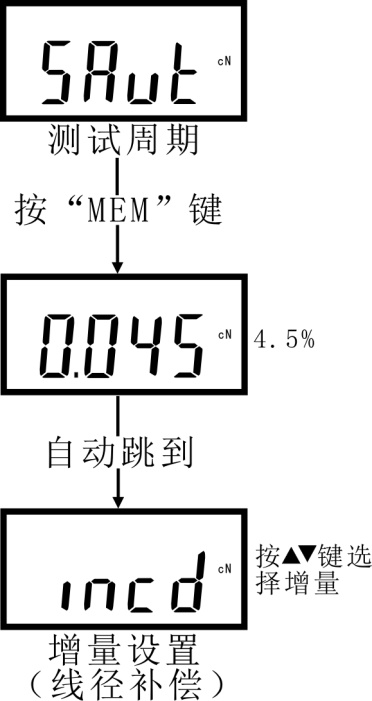
4.3test period
The unit is seconds, for \"HOLD\"Mode. For example select \"1.4\"Seconds in \"HOLD\"When applying force in mode,Every time the instrument display1.4A set of data will flash in secondsAnd automatically saveAnd each set of data contains含有Maximum, minimum, average.
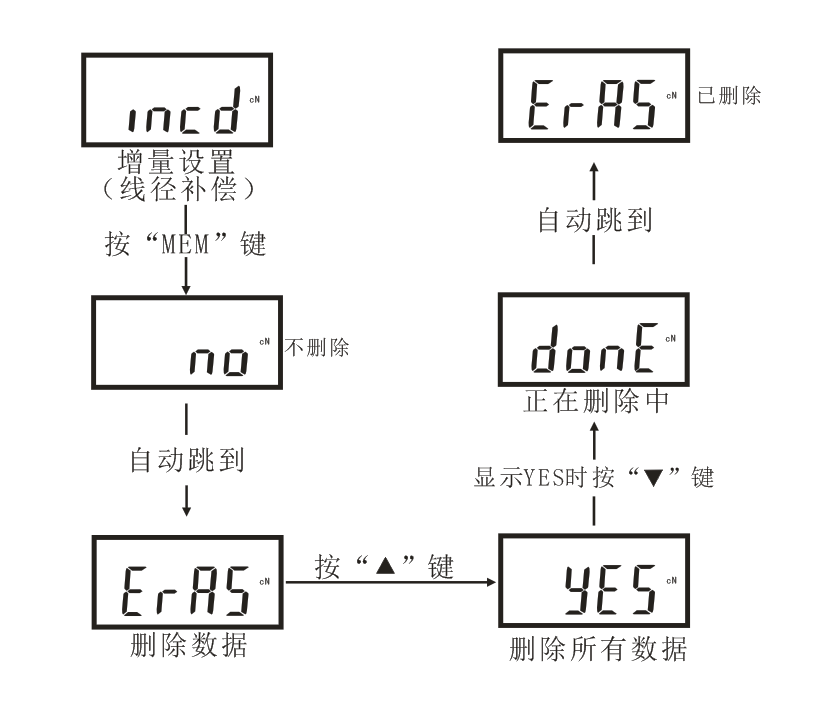
4.4Wire diameter compensation (incremental setting)
the unit is\"%\",For example, full scale is50N, The test results are48N, Then the accuracy is4%, You can choose a suitable compensation at this time, for example0.045(4.5%) To reduce errors.
4.5 Clear data
Delete all data stored in the instrument. \"YES\"To delete all,display\"YES\"Timepress\"\"Select to confirm deletion of data. Press \"MD\"Direct exit without deleting data.As shown below:
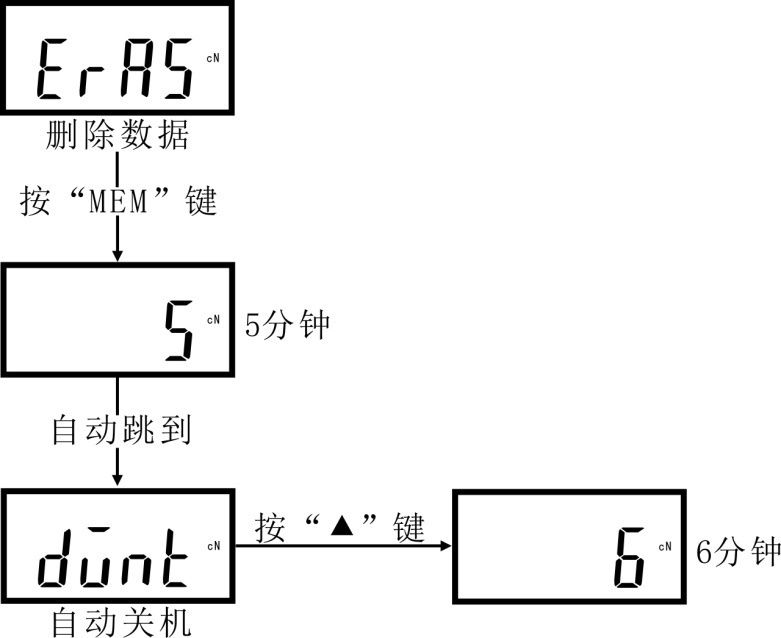
4.6 Automatic shutdown time
Configurable0-15The instrument automatically shuts down in minutes without operation, \"0\"To not automatically shut down, press \" \"Key to select the automatic shutdown time.
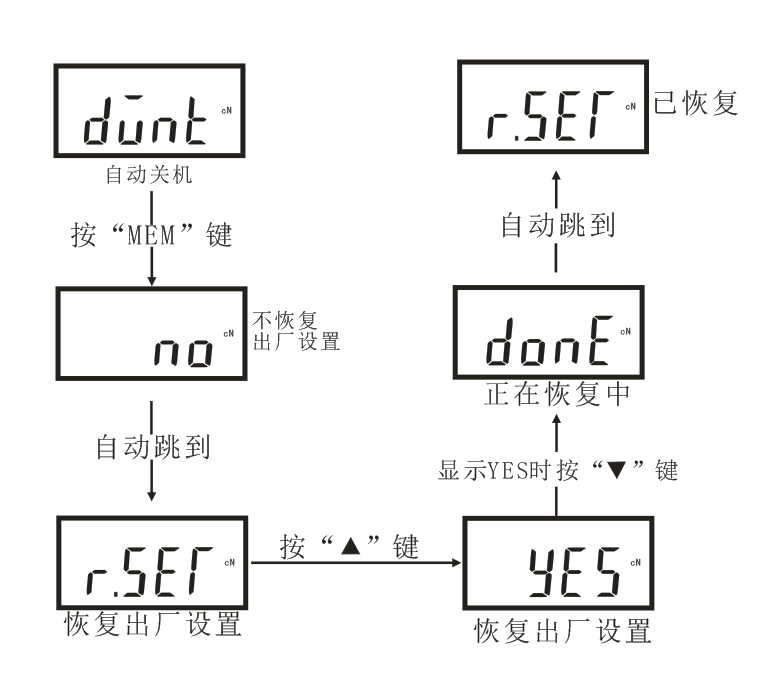
4.7 reset
To restore the factory settings, press \"\"Key to select to restore factory settings, display \"YES\"Timepress\" \"keyConfirm factory reset. As shown below:
Fives,Battery installation and replacement
5.1When \"appears in the upper right corner of the LCD screenB\"When the battery power is low,Please charge now,Or replace the battery.
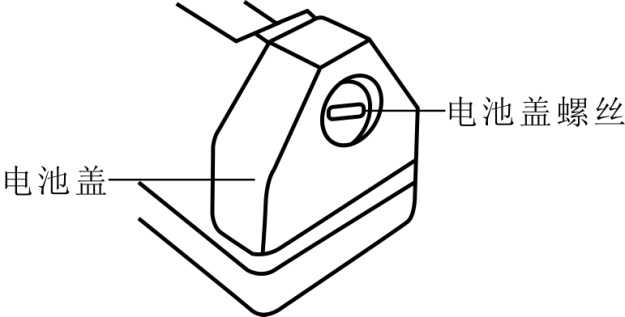
Method of operation:Use a flat-blade screwdriver to unscrew the battery cover located at the rear of the instrument counterclockwise。As shown below:
5.2把2节5号3.7VOf the lithium batteryInsert the battery sleeve and insert the battery according to the positive and negative indications of the battery inside the battery cover.
As shown below:
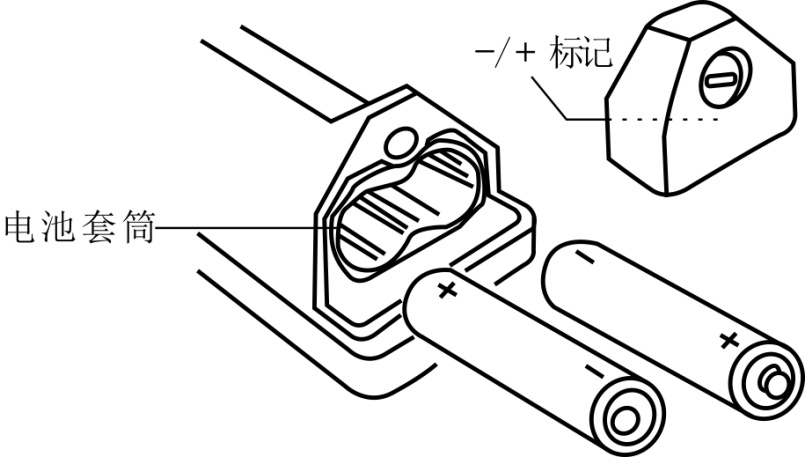
5.3Tighten the battery cover clockwise.
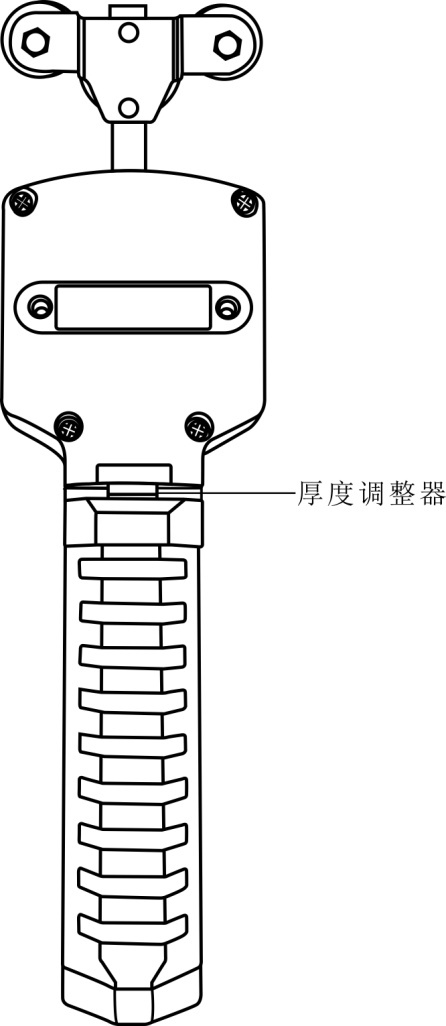
6. Thickness adjuster
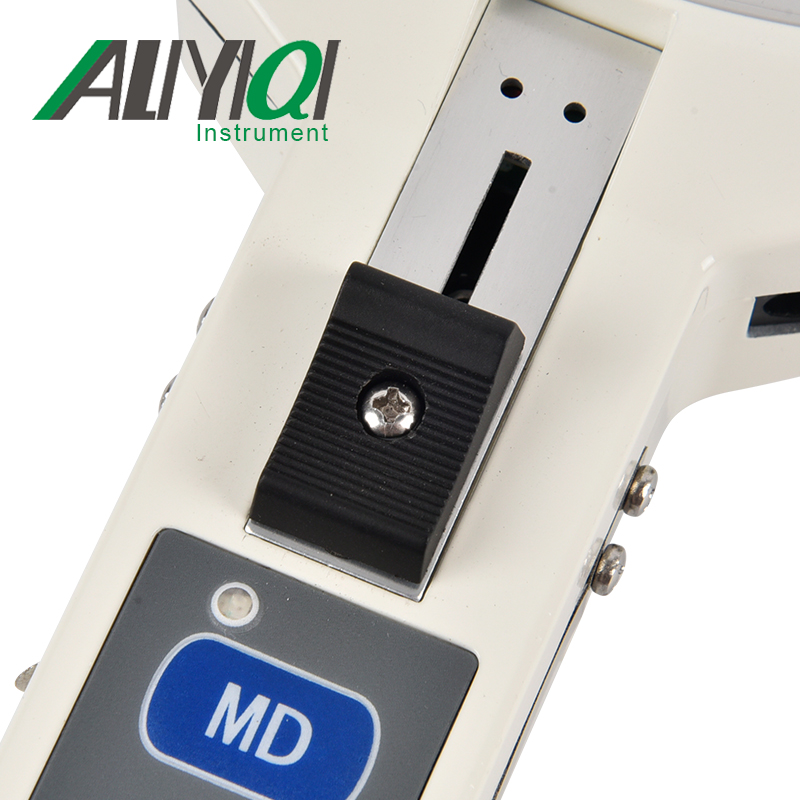
6.1When we use \"3Drum measurement principle, even if the linear tension is unchanged, the increase in the material diameter will also lead to an increase in the tension reading. The instrument's special thickness adjuster system can automatically convert to an external roller to compensate for this effect. Measuring diameter can be accurate to0.01mm, Can be used as a factor of computer calibration formula.
Thickness adjuster position于On the back of the instrument, push the thumb slider forward, the two metal blocks will separate to form a material insertable缝。
6.2 When using monofilament, metal wire and other materials that are not easy to bend, the sample must be fully prepared before inserting the thickness adjuster. Use pliers to bend the sample as shown below. Keep the single filament as shown belowA\"Arc, and then the sample bends into the thickness adjuster.

6.3Push your thumb滑Move the block forward, place the sample in the slit, and slowly reset the thumb slider. The sample should be fixed between the two metal blocks, just put the terminal of the sample under the clamp.
7. Operation steps
7.1press\"P / C\"Key to turn on the instrument and select the appropriate test modeWith the unit。
7.2Push the thumb slider forward until the outer twoguide轮Stretch out and beyondLead frame。
7.3Put the sample inMeasuring wheelAnd slowly release the thumb slider until it returns to its original position, The LCD screen will start to display the test data. (Note: it is not allowedThumb sliderReturn quickly,otherwiseWill affect the accuracy and damage the instrument. )As shown below:

8. Data output
byUSBThe interface can transfer the stored data to the computer,Cooperate with the software produced by the manufacturer to realize data processing.
The software interface is as follows:
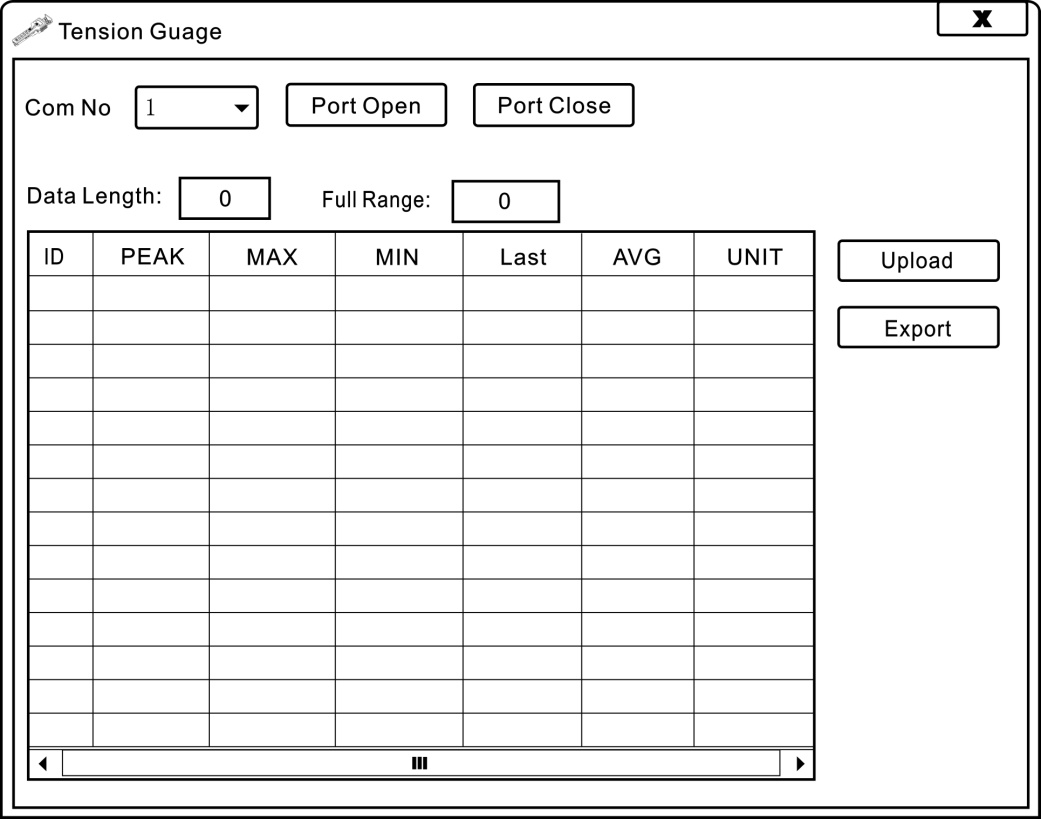
Use the CD provided by the manufacturer, install the communication software on the computer, and thenHandheld digital tension meterConnect with data cable when power onHandheld digital tension meterWith the computer, double-click the software icon to open the software, first select \"Com No(Port number) \", then click \"Port Open\",then click\"Upload\"At this time, the stored data in the instrument will appear on the table, indicating that the host computer has been successfully connected and the purpose of reading the stored data has been achieved.
Nine, repair and maintenance
9.1The measuring wheels and guide wheels should be checked regularly to ensure that they operate lightly and smoothly.
9.2Under normal usage time and load, we recommend a verification period of one year.
9.3Don't use it as a hammer during use, try to avoid knocking and falling.
9.4It is strictly forbidden to use it in overload, so as not to damage the sensor of the instrument.
9.5It is strictly forbidden to disassemble the instrument at will. If you encounter problems, please contact our company in time.
9.6 When cleaning, do not use any corrosive solution.
9.7 When not using the instrument for a long time, please remove the battery.
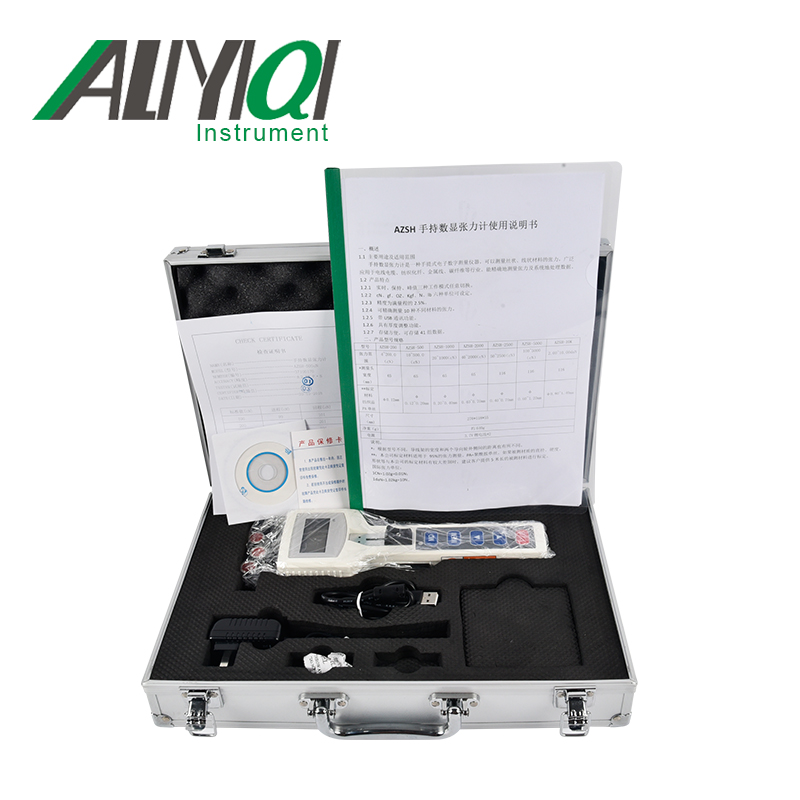
十,packing list
|
1 |
Handheld digital tension meter |
1只 |
|
2 |
Instructions |
1份 |
|
3 |
Certificate of conformity |
1份 |
|
4 |
Inspection certificate |
1份 |
|
5 |
Desiccant |
1包 |
|
6 |
USBData cable |
1根 |
|
7 |
12Vcharger |
1个 |