

ANQH扭力screwdriverCalibratoruser's Guide
I. Overview
1.1Main purpose and scope of application
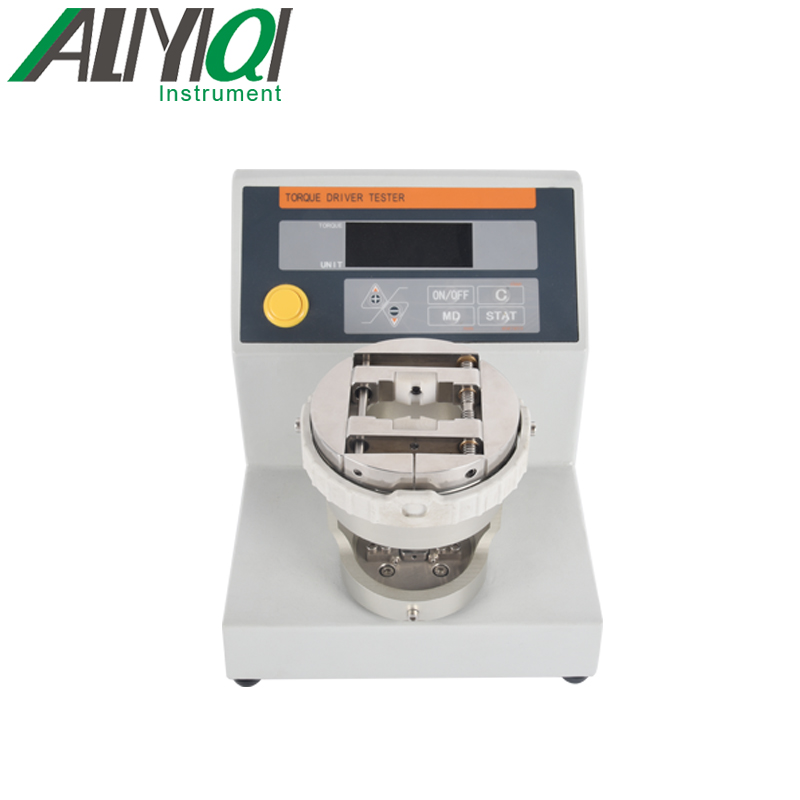
ANQH torque screwdriver tester is an intelligent measuring instrument designed and developed for detecting various torques. It is mainly used for the torque setting of various electric and pneumatic screwdrivers, the detection and correction of torque screwdrivers, torque screwdrivers, etc., and the torsional damage test of parts. Widely used in electrical manufacturing, mechanical manufacturing, automotive light industry and professional scientific research and testing industries.
1.2 Product features
1.2.1 The mechanical loading function can eliminate errors caused by variable factors such as the operator's measurement speed or force.
1.2.2 The torque driver can be firmly fixed by the loading device, so as to minimize the individual error range.
1.2.3
1.3 Specification parameter table
|
model |
ANQH-2 |
ANQH-10 |
|
Maximum |
2N.m |
10N.m |
|
0.2kgf.cm |
1kgf.cm |
|
|
0.45Lbf.in |
2.2Lbf.in |
|
|
Minimum resolution |
0.0001 |
0.001 |
|
Accuracy |
±1% |
|
|
unit |
N.m / Kgf.cm / Lbf.in |
|
|
Data storage |
100条 |
|
|
power supply |
Enter:AC 220V或110V Output:DC 12V |
|
|
Operating temperature |
5℃~35℃ |
|
|
Transport temperature |
-10℃~60℃ |
|
|
working environment |
No vibrating sources and corrosive media around |
|
|
Dimensions(mm) |
220 * 234 * 225 |
|
|
weight(kg) |
14.5 |
|
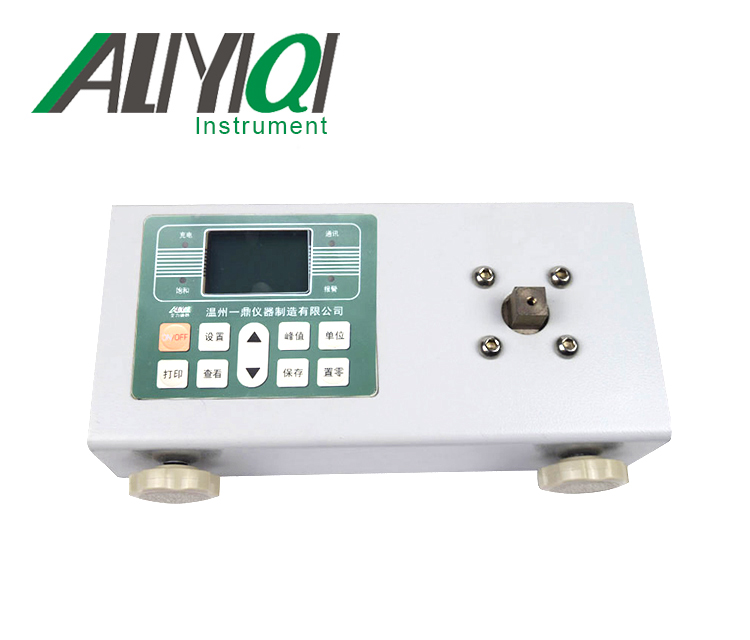
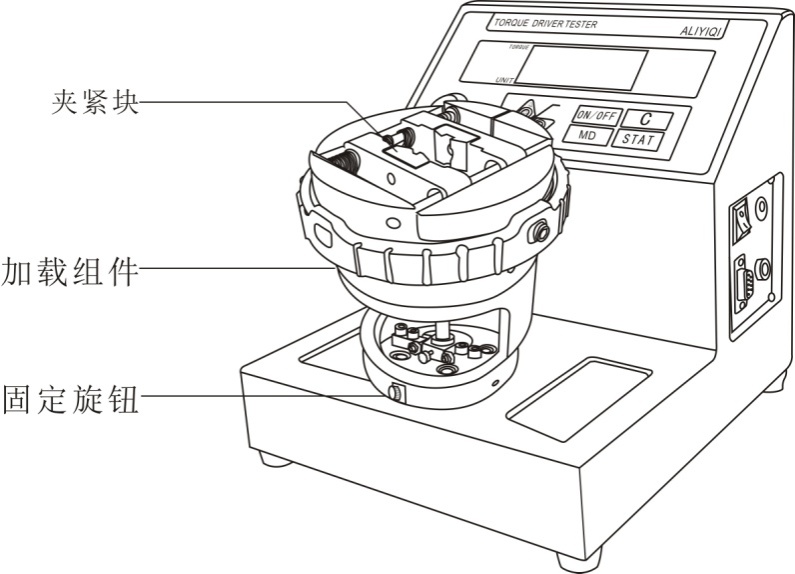
two,Product overall structure
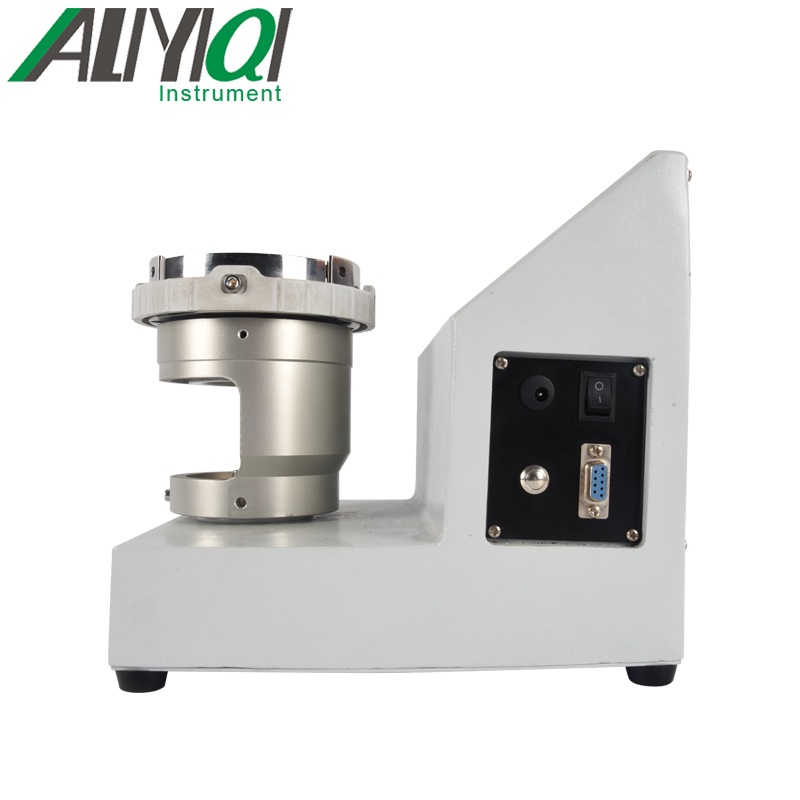
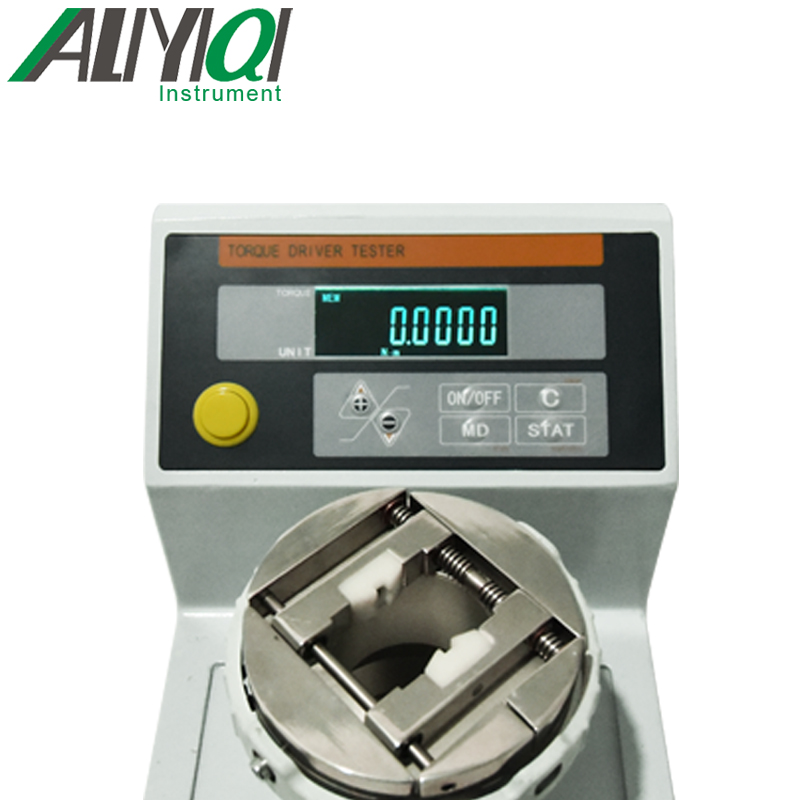
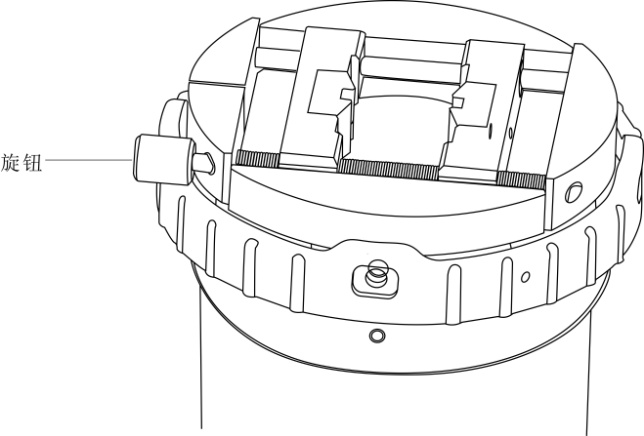
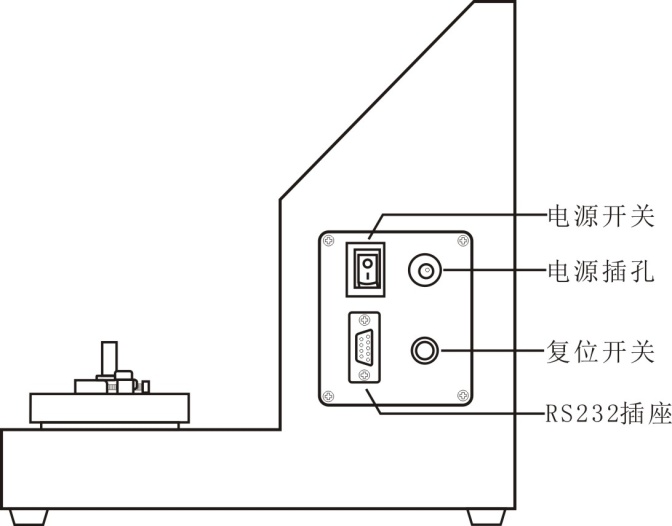
2.1external structure
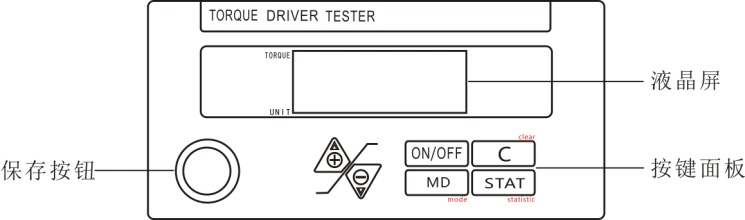
2.2 Key introduction
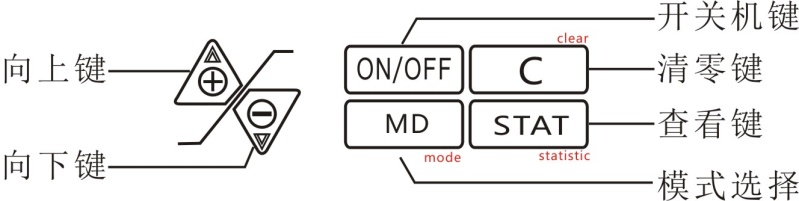
2.2.1 Up key:Press this key on the measurement interface to make the measured data180° Rotation; in the setting interface, there is a function to select upward and increase the value.
2.2.2 Down arrow: In the setting interface, there are downward selection and displacementFeatures。
2.2.3 Switch key: power on and off function.
2.2.4 Clear key: The measurement interface has data clear function, and the setting interface has return function, There is a function to clear all data in the saved data view interface。
2.2.5 View key: In the measurement interface, there is a function to view saved data.
2.2.6 Mode selection: In the measurement interface, press this key to switch between peak mode and real-time measurement mode. Long press this key for 6 seconds to enter the setting interface. This key has a save function in the setting interface.
3. Function introduction
3.1 Setting items
3.1.1 In the measurement interface, long press \"MD \"8Seconds, enter the setting interface, as shown below:

3.1.2 (UNIT) Unit setting: The instrument can switch 3 units, after entering the unit setting interface, press \"+ \"和\"-\" Key to select the unit, as shown below:

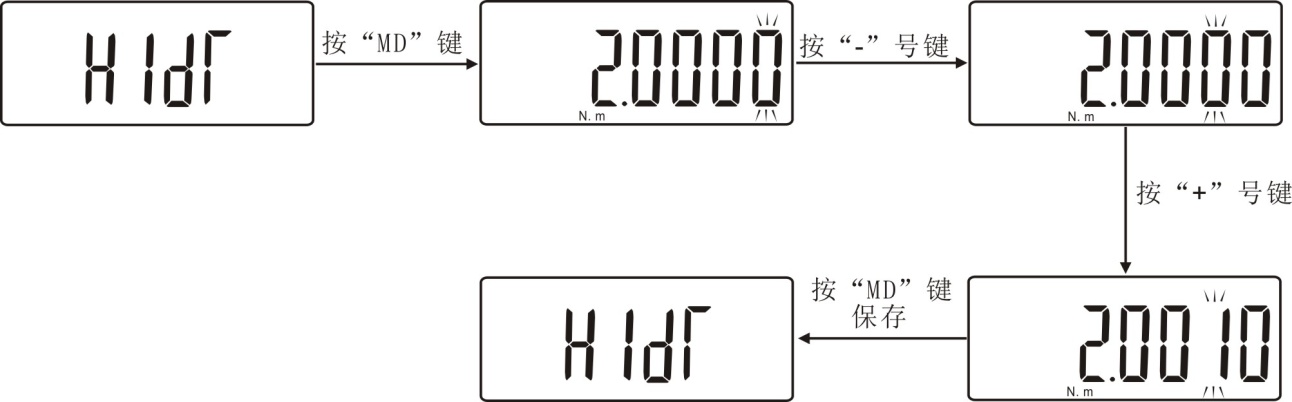
3.1.3  (HIDT) Test value upper limit setting: Set the test value upper limit. Above the upper limit is out of range, \"MAXdisplay\",The default upper limit value of this instrument is full scale. If you want to reset the upper limit, under this setting item, you can use \"+\"with\"-\"Key setting. Press \"MDAfter saving, return to the setting interface.As shown below:
3.1.4  (LODT) Test value lower limit setting: Set the test value lower limit. Below the lower limit is out of range, \"MIN\"display,The lower limit of this instrument defaults to0. If you want to reset the lower limit, under this setting item, use \"+\"with\"-\"Key setting. Press \"MD\"Key to save and return to the setting interface. As shown below:

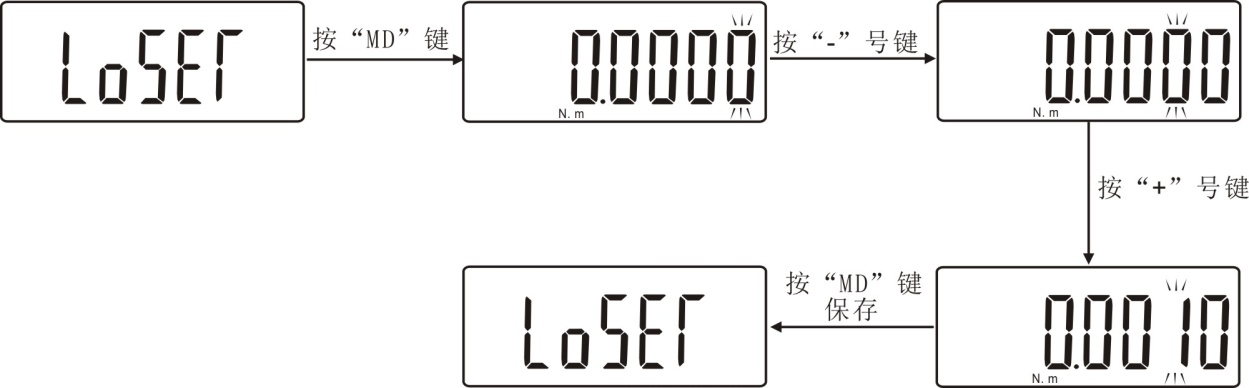
3.1.5 (LOSET) Minimum saved value of peak value:Minimum peak saved value,The minimum stored value of the peak value of this instrument defaults to0. In peak mode, when the current value is less than this value, the peak value will not be saved. Under this setting item,use\"+\"with\"-\"key可set upPeak minimum saved value。As shown below:
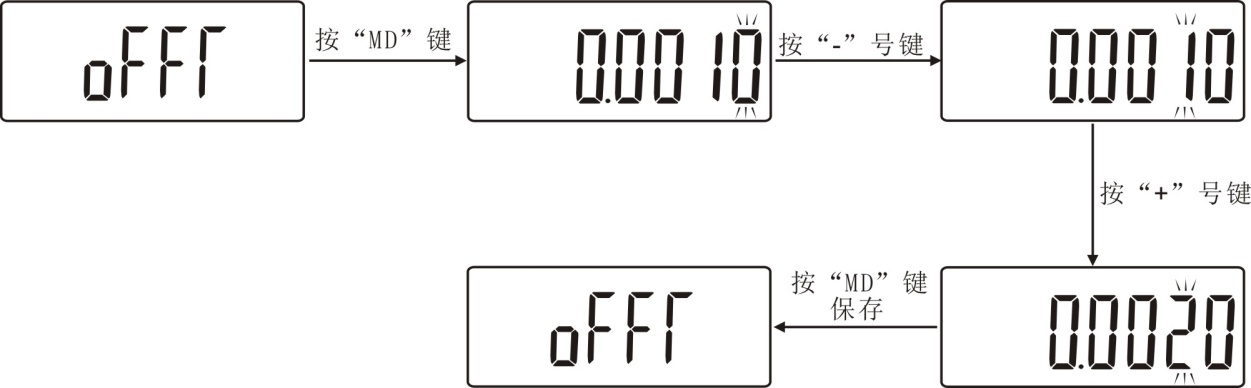
3.1.6 (OFFT) Automatic shutdown time setting:本Instrument defaultAutomatic shutdown timeFor 10 minutes。Under this setting item, use \"+ \" and \"-\"键Select, can be set from 0 minutes to 99999Automatic shutdown in minutes, can also be set \"00000 \"Does not automatically shut down. If you do not want to shut down automatically, press \" MD \"to complete the setting after selection and return to the setting interface.As shown below:
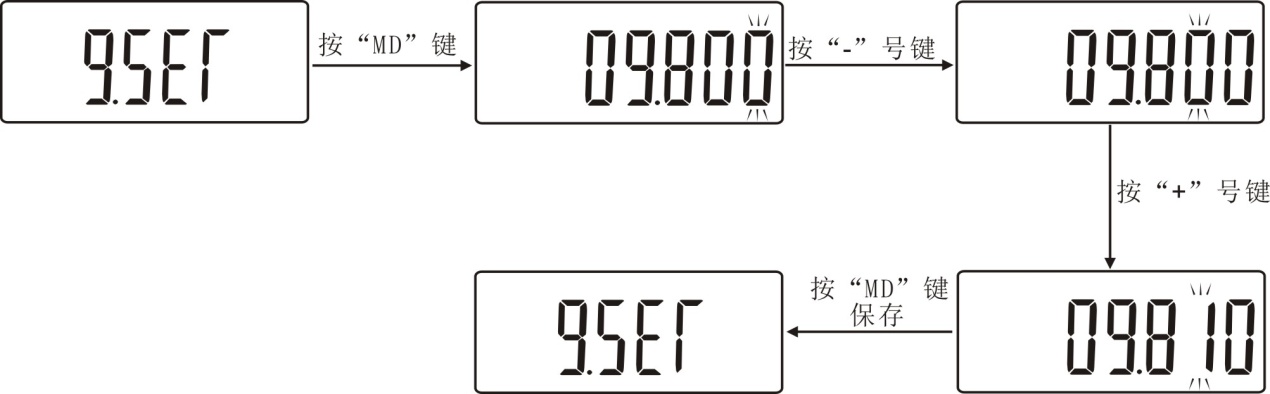
3.1.7 (G.SET) Gravity acceleration setting: the user can set the gravity acceleration value according to the location of the region,This instrumentThe default is 09.800.Under this setting item, you can use \"+ \" and \"-\" keys to set the gravity acceleration setting value. As shown below:
3.1.8  (REF) The manufacturer's setting value: has nothing to do with the user.
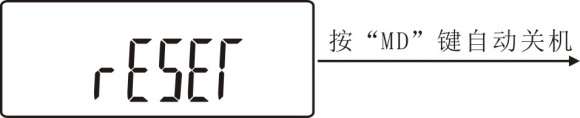
3.1.9  (RESET) Factory reset function:Under this setting item, press \"MD\"Key to restore the factory settings,Instrument AutomaticShut down,If you use the machine to restart the machine.As shown below:
3.1.10View saved data
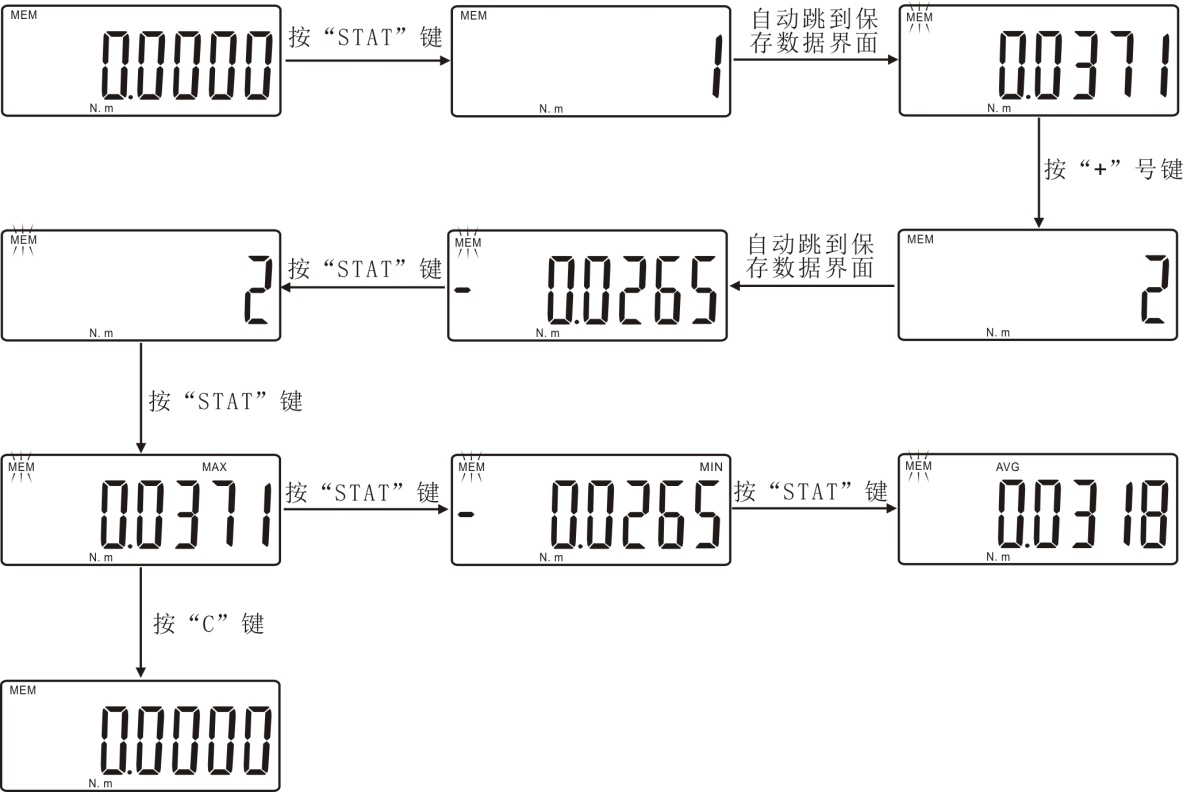
After saving the measurement data, press \"STAT \" key, \"1 \" appears on the screen, indicating the first set of stored data, and then the screen automatically displays the saved data;Press \"+ \" again键, \"2 \" appears on the screen后Automatically display the saved second set of data;carry onPress \"+ \"键, The screen automatically displays the saved third set of data, then press \"STAT \"key,The screen displays \"3 \", indicating the total number of stored data groups, and then pressing \"STAT \" key will display the maximum value of the total stored data,Then press \"STAT \"键, The minimum value of the sum of saved values will be displayed,Press \"STAT \" again键, The average value of the sum of the stored values will be displayed, and then you can press \"C \" to return to the measurement interface. As shown below:
3.1.11clear data
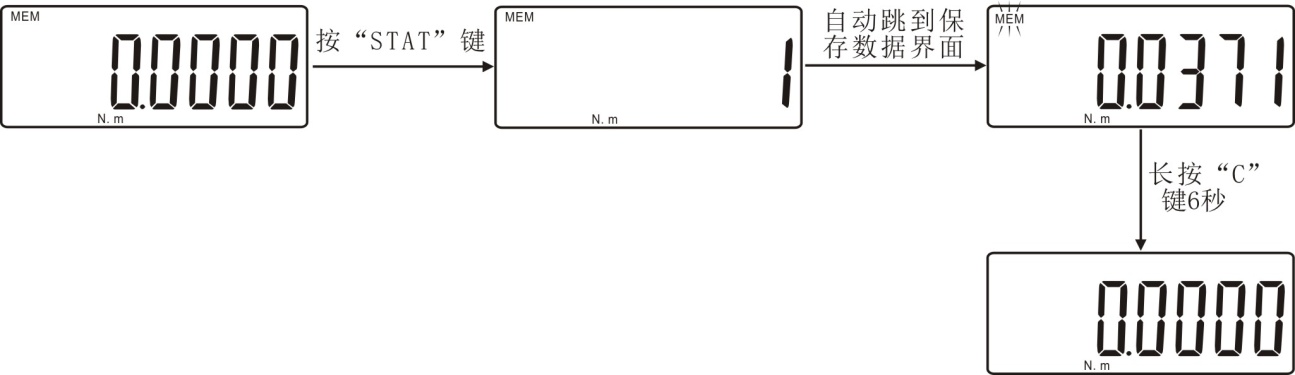
After holding down the\"\" C\"\" key for 6 seconds on the data saving interface, all the saved data will be cleared and automatically return to the measurement interface. As shown below:
4. Operation steps
4.1Place the instrument on a stable workbench.
4.2 Connect the power adapter to the power jack and turn on the power.
4.3 Perform the settings required for measurement; for example: unit, measurement mode.
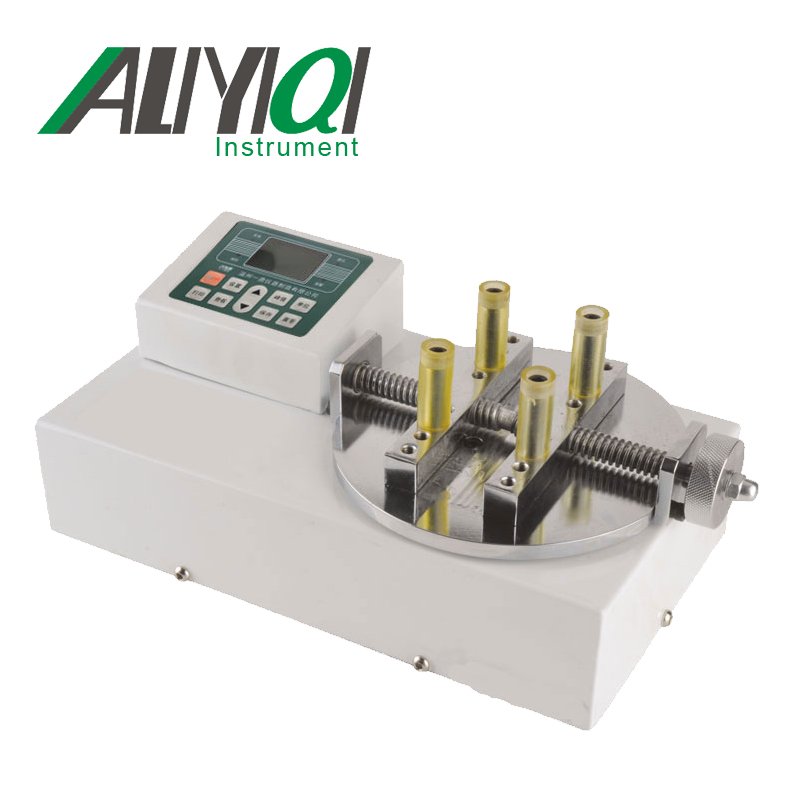
4.4 Put the torque driver into the loading assembly, And fixed with clamping block.
4.5 Press C \"key to clear. \"
4.6 Apply torque to the loaded components until the torque driver makes a\"click\" sound.
4.7 When the torque driver makes a\"click\" sound, loosen the torque. In real-time mode, press \"STAT \" key to save data;In the value mode, the torque is automatically saved when the torque is released (the value should be greater than the minimum saved value of the peak value), and then the value is automatically reset.
五, Daily maintenance and maintenance
5.1Stop using this product when there is smoke, odor, or abnormal noise. Use under abnormal conditions may cause electric shock or fire. Turn off the power immediately and pull the plug from the socket.
5.2It is forbidden to disassemble or modify this instrument. Avoid loss of safety performance, functional degradation, shortened product life or failure.
5.3When impurities or liquids such as water enter the product, stop using it. Avoid electric shock or fire hazard.
5.4Do not connect or disconnect the power plug with wet hands. Avoid the risk of electric shock.
5.5Prohibited at the specified voltage (AC Use the instrument at voltages other than 110V / 220V). It may cause electric shock or fire.
5.6It is forbidden to use damaged wires. Avoid electric shock or fire.The following instructions should be followed when using wires:
•It is forbidden to damage, extend or heat the wires.
•Do not jerk or squeeze the wire.
•Do not bend, twist or bundle wires
5.7Do not place the instrument on an unstable or swaying place, such as a swaying desk or a slanted surface. Avoid falling the instrument and causing personal injury.
5.8It is forbidden to place the instrument in the place with flammable liquid or combustible gas. Avoid electric shock or fire.
5.9Do not place the instrument in a humid or dusty place and a place with large changes in humidity or temperature.
5.10If you will not use the instrument for a long time, please pull the power plug out of the socket for safety.
5.11Do not use this instrument for measurements outside the torque measurement range.
5.12Before use, check the damage of the instrument to ensure that the instrument can work normally and perform the specified functions.
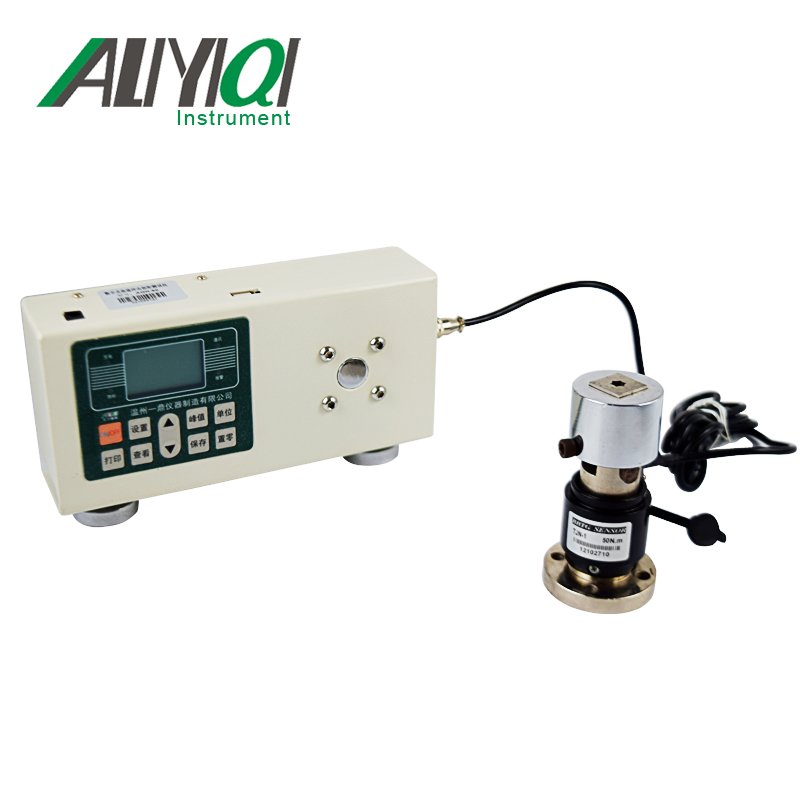
六, Attachment list
|
1 |
Main part of torque screwdriver calibrator |
1 item |
|
2 |
Load components |
1 item |
|
3 |
Knurled flat head screw M4×12 |
1 |
|
4 |
Instructions |
1 serving |
|
5 |
Certificate of conformity |
1 serving |
|
6 |
Desiccant |
1 package |
|
7 |
Power Adapter |
1 |
|
8 |
Hex wrench M4 |
1 |