

I. Overview
1.1Main purpose and scope of application
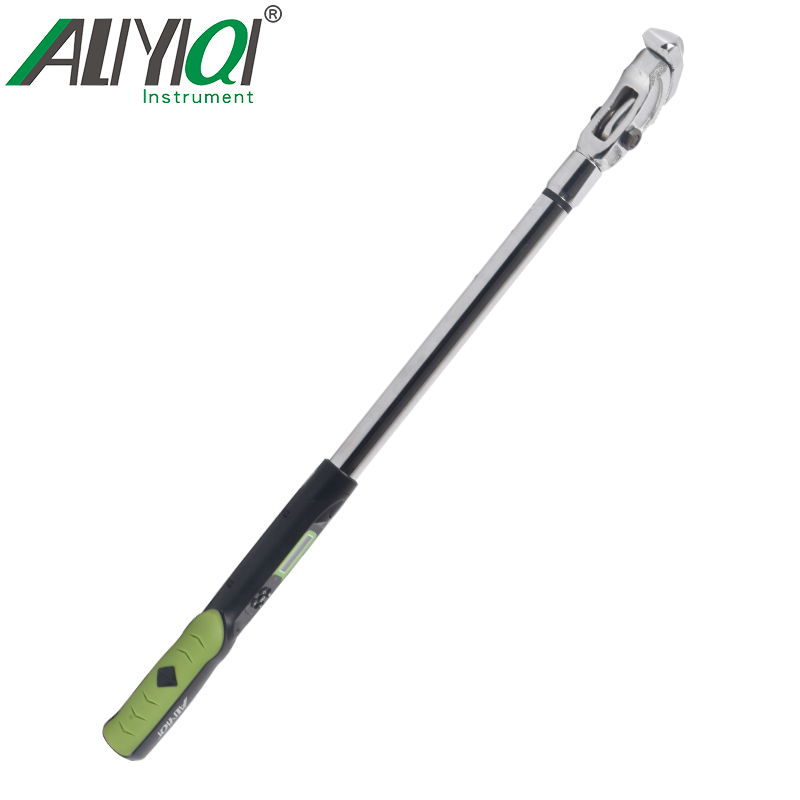
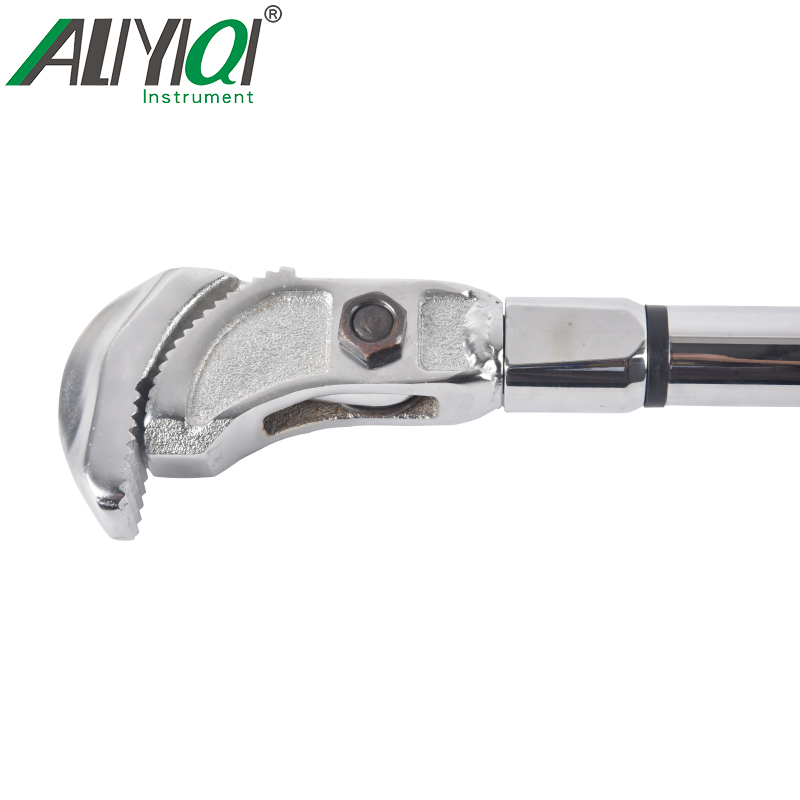
Reinforced head digital torque wrench is different from general torque wrench. It has powerful operation functions, including torque setting; unit setting; mode setting; value storage; value clearing; value output and user correction function. Easy to operate, by installing digital displayScreen downRequirements for the operator. It is suitable for the fastening and control of reinforced bolts in construction industry, aerospace, repair industry, inspection structure, etc.
1.2Features
1.2.1Digital display torque reading
1.2.2Clockwise ±3%, Counterclockwise ±3.5%Accuracy (of the MAX operating range20 ~ 100%)
1.2.3Can operate clockwise and counterclockwise
1.2.4Peak hold and real-time mode
1.2.5Buzzer andLCDIndication (when the predetermined torque value is reached)
1.2.6Four engineering units (ft.lb、in.lb、N.m、kgf.cm)
1.2.7 100Pen can store recorded values
1.2.8Communication function
1.2.9 5Automatic shutdown in minutes
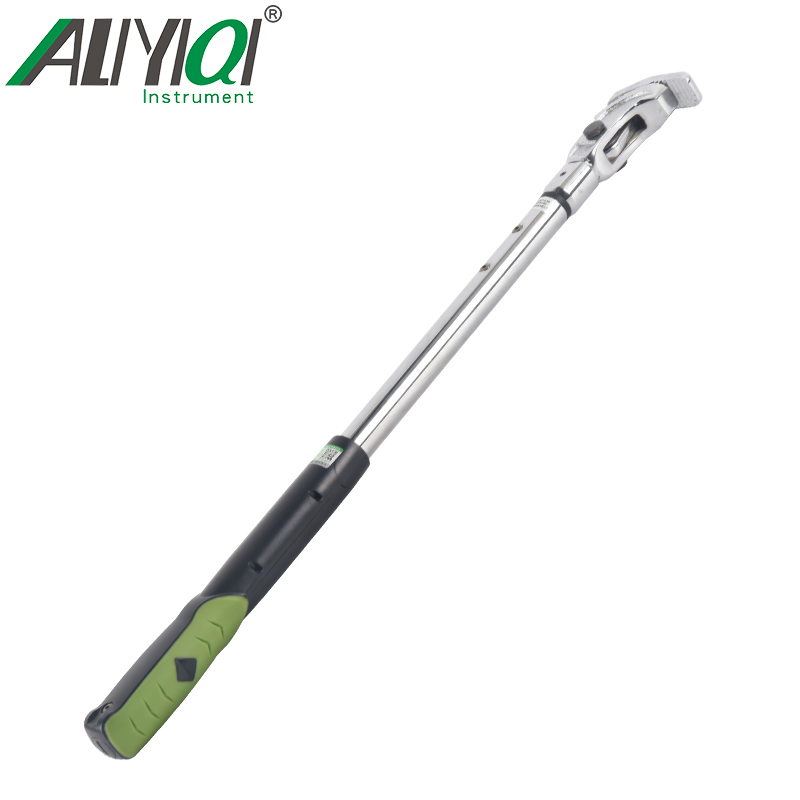
2. Function and name of each component

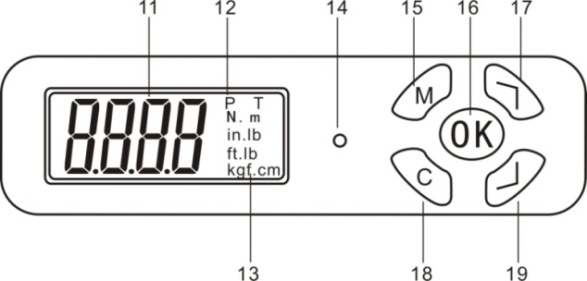
1, Rebar head11, Torque value
2, Pole12、P(Peak mode),T(Real-time mode)
3, Communication hole13,unit(N.m、in.lb、ft.lb、kgf.cm)
4、LCDscreen14、ledIndicator light
5,panel15, Menu button
6,button16, OK button
7,buzzer17, Up button
8,handle18, Cancel button
9,Battery case19, Down button
10, Back cover
3. Product Technical Specifications
|
model |
AWG2-S-340R |
AWG2-S-410R |
|
MIN index value |
0.1 |
|
|
MAX operating range (N.m) |
340N.m / 250ft.lb / 3009in.lb / 3467.03kgf.cm |
410N.m / 302.58ft.lb / 3628.5in.lb / 4180.85kgf.cm |
|
Connector(inches) |
1/29(14 * 18) |
|
|
Buzzer setting range (N.m) |
17 ~ 340 |
20.5 ~ 410 |
|
length |
715 |
|
|
Accuracy*1 |
Clockwise: ±3% Counterclockwise: ±3.5% |
|
|
Data storage capacity |
100 |
|
|
Operating mode |
Peak holdP)/Real-time mode (T) |
|
|
unit |
N.m、in.lb、ft.lb、kgf.cm |
|
|
ratchetHead form |
Rebar head |
|
|
Number of keys |
5 |
|
|
battery |
2节1.5V 5Size battery |
|
|
Operating temperature |
-10℃~ 60℃ |
|
|
storage temperature |
-20℃~ 70℃ |
|
|
humidity |
No condensation90% |
|
|
Drop test height |
1米 |
|
|
Vibration test conditions*2 |
10G |
|
|
life span test* 3 |
10000次 |
|
*: Please see the comments at the back of the table
note:
*13. The accuracy guarantee range is within the MAX operating value20%到100%. Torque accuracy is the normal value. The correction accuracy is based on the middle groove of the five grooves on the grip as the correction point. To ensure accuracy, it is recommended to calibrate once a year.
*23. Life test includes horizontal test and vertical test.
* 3, \"Once \" means to remove the wrench from0N.mApply force to the MAX operation setting value of the wrench, and then return to0N.m。
4. Precautions before using the wrench
4.1、 Insert the battery
4.1.13. Take out the battery cover.
4.1.22. Put two No. 5 batteries into the battery box, please pay attention to the positive and negative directions.
 4.1.31. Close the battery cover and rotate the battery cover to the position shown below and below.
4.2, Power on and reset
4.2.1,press\"C\"Key to turn on the wrench power
4.2.21. After the power is turned on, press \"C\"Key reset wrench

note:
13. If the wrench has an external force on the wrench before turning on the power, turn on the power/After resetting, an offset value will be displayed on the screen.
2, \"N.m\"with\"T\"FromEEPROMLoading. Once the user changes the unit or mode, it will always existEEPROM。
4.3, Wake up the wrench during sleep
4.3.1, In order to save power, if there is no operation. About5It will enter sleep mode in minutes. press\"C\"Key can wake up wrench
4.4, Low voltage protection
4.4.13. If the system detects that the battery voltage is lower than2.2V, The wrench will cut off the power; the wrench voltage is lower than2.2V时 , The wrench will automatically shut down.
Fives,Instructions
5.1, zero setting switch: press C key to boot, after bootingIf the force valueWhen it appears, you can press the C button to clear it, enter the sleep mode within 5 minutes without operation, press the C button to start, and alsoSelect long pressC key to shut down.
5.2. Preset value setting method: under normal power onShort click on the interfaceM key, use the up and down keys to switch the preset value you need. After setting the preset value, the system will automatically save the preset value. Press the M key continuously until you return to the measurement interface.
5.3 Setting method of real-time and peak mode: The default real-time mode T of this product is turned on, if you want to switch the peak mode P, you need to measureShort press twiceM key, NODE appears, and then you can select the T.P switching mode through the up and down keys. After the selection is completed, press the M key continuously until you return to the measurement interface.
5.4, Unit mode setting method: This product hasN.m, In.lb, ft.lb, kgf.cm four unit mode selection, can be switched according to actual use. Setting method in measurementShort press the interface three timesM key, UNLT appears, then you can use the up and down keys to select the unit mode you need, after the selection is complete, press the M key continuously until you return to the measurement interface.
5.5. Data saving and viewing method: data saving. In the P peak mode, the measured data is directly pressed by the C button to give up, press the OK button to save, the save will automatically return to the measurement interface to test again Cyclic, the data can be saved in 99 groups (the data numbers are in order 001.002 .... 099).
Data viewing. During measurementShort press interfacePress the M key to view the saved data group under 4 (display 0000 when there is no data saved). You can view the data number through the up and down keys. After two seconds of no operation, the detailed force value stored in the number is displayed. After viewing, press the M key continuously until you return to measurement Interface.
5.6, clear the data storage value: in the measurementShort press interfaceCLR appears under the M key 5, then press CKey appearsNO? Press C again to confirm and clear. DEL shows that it is complete and returns directly to the measurement interface. (If you press the M key on the NO? Interface, it means to abandon the deletion and return to the measurement interface. Note: clearing the data is to clear all at onceFinish soData, there is no single operation)
六, Communication function
6.1、 Connect the communication line
6.1.11. After turning off the power of the wrench, use the attached communication cable to connect the computer communication hole and the wrench.
6.2, Upload stored value
6.2.1, Confirm received妥PCWith wrench.
6.2.2, Press toCLRPress againKey appears\" \".(reference\"5.6\"chapter)
6.2.3,inPCStart the upload software.
6.2.41. When uploading software, first select the correct oneCom NoAnd click \"Port Open\"Open the port.
6.2.51. Next, clickuploadKey to transfer the stored value to the computer.
6.2.6,then click\"Export\", The system will automaticallyExcelFormat to open the uploaded data.
6.2.73. Select the appropriate storage path to save the data table you uploaded.
7. Maintenance and storage
7.1,note:
In order to maintain good accuracy, it is recommended to recalibrate once every year.
7.2、 Over-torque may cause damage or loss of accuracy (more than MAX torque range105%).
7.33. Do not shake the wrench violently or drop the wrench on the ground.
7.41. Do not use the wrench as a hammer.
7.52. Do not place the wrench in a place with high temperature, high humidity or direct sunlight.
7.61. Do not use a wrench near water.
7.7If you accidentally get the wrench wet, please wipe it dry with a dry towel immediately. Salt in the sea water may damage the wrench.
7.81. Do not use organic solvents to clean the wrench, such as alcohol or paint thinner.
7.93. Do not put the wrench near magnetic objects.
7.102. Do not place the wrench in a place where there is a lot of dust or sand. This will cause serious damage to the wrench.
7.11, Do not pressLCDscreen.
Eight, battery handling
8.12. If the torque wrench is not used for a long time, please remove the battery.
8.21. When you need to travel long distances or in cold areas, please prepare spare batteries.
8.31. Do not mix batteries of different brands, and do not mix old and new batteries.
8.4, Sweat, oil, etc. will hinder the contact of the battery electrode, please wipe the battery clean before putting in the torque wrench.
8.53. Please discard the used batteries in the designated recycling place. Do not put the battery into fire.
9. List of random attachments
|
1 |
Data cable |
1根 |
With communication |
|
2 |
5Vbattery |
1对 |
|
|
3 |
Battery box key |
1把 |
|
|
4 |
Data disc |
1张 |
With communication |
|
5 |
charger |
1个 |
With communication |